Many of us use Node.js for writing the backend code because of its convenience and speed. In some cases, we need more than what Node.js provides, especially when it comes to speed-related questions. This is when WebAssembly comes in handy. In this article, we are going to discuss how to use Node.js with Rust.
Getting Started with Rust
There is a good book that highlights all the major aspects of Rust. It provides clear explanations on how to get started with the Rust programming language. The book consists of 21 chapters. Reading the first 10 chapters will be enough for the start.
Step 1. Rust Setup
To begin with, you need to install Rust (use this link to start the setup). In this tutorial, we’ll be using wasm-pack to compile Rust into .wasm and .js files.
Step 2. Preparation Stage
Once Rust is installed, bootstrap your Rust project by means of wasm-pack. It can be located inside any folder of your Node.js application. The command to generate our project is:
wasm-pack new myproject
The generated code is not perfect, so we need to apply some changes to enhance it.
Step 3. Cargo.toml
By means of the new command, we generate Cargo.toml file with the dependencies (like package.json). We are going to add one more dependency inside the Cargo.toml file to use Node.js standard API functions. Write the following code:
[dependencies.web-sys]
version = "0.3.22"
features = ["console"]
Step 4. lib.rs file
The generated code inside the lib.rs file looks like this:
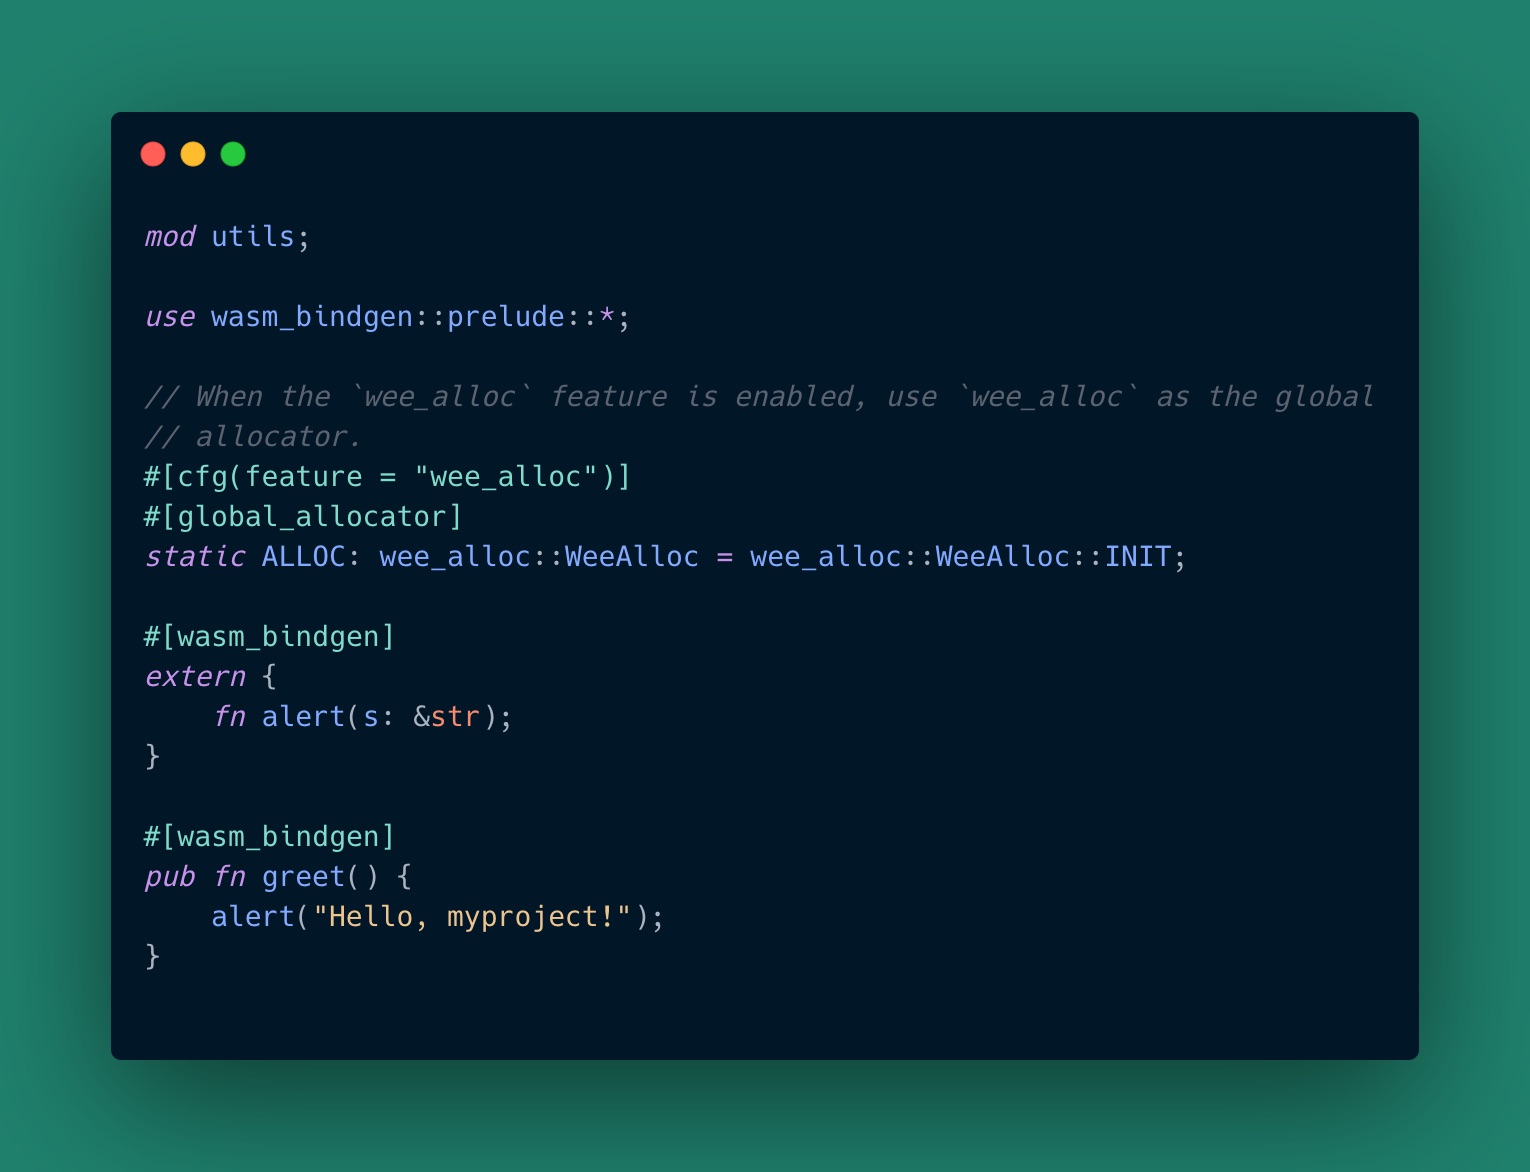 lib.rs
We use the wasm-bindgen, which generates the respective .js files for the following use from Node.js. We’ll compile the greet function to the JS function. All the following files that we want to expose after the compilation should be public and tagged with the #[wasm_bindgen] attribute.
Using the following lines of code, we can specify which JS functions should be imported from the standard library.
#[wasm_bindgen]
extern {
    fn alert(s: &str);
}
Let’s consider the following example. To import the standard alert function from your browser’s API, use the following command inside the greet function:
pub fn greet() {
    alert("Hello, myproject!");
}
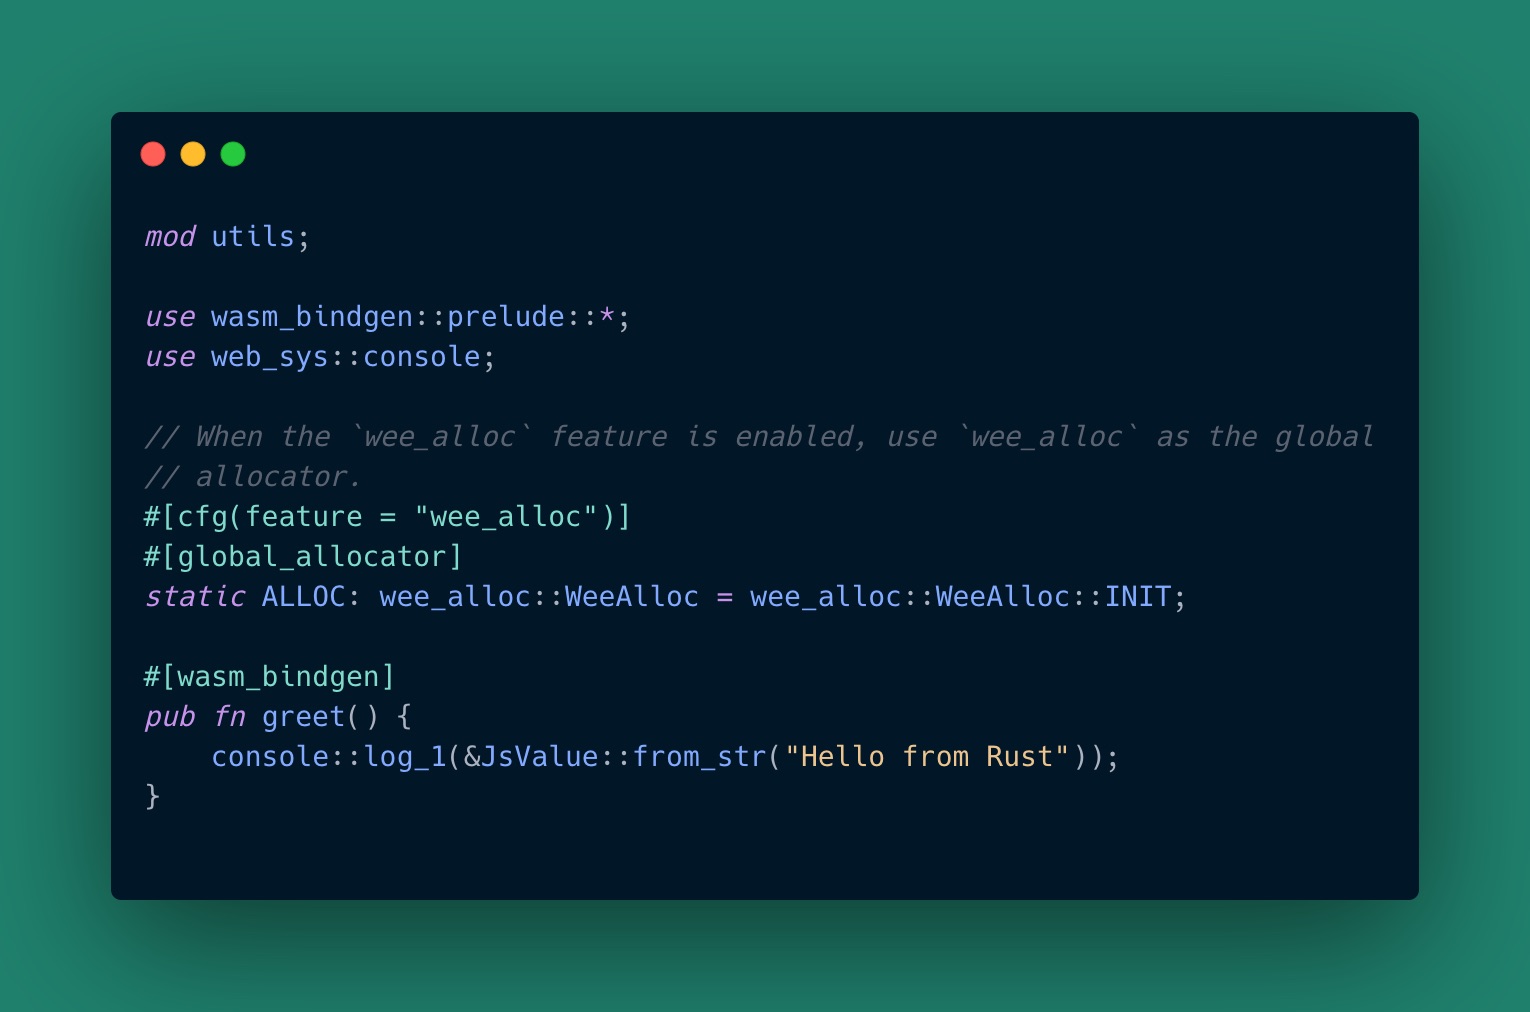
Next, we’ll delete the import of the alert function and write a message to the console in the greet function.
There is one more thing that we need to change in the file that we are working with. We need to add the main function. Here’s what we need to do to apply the change:
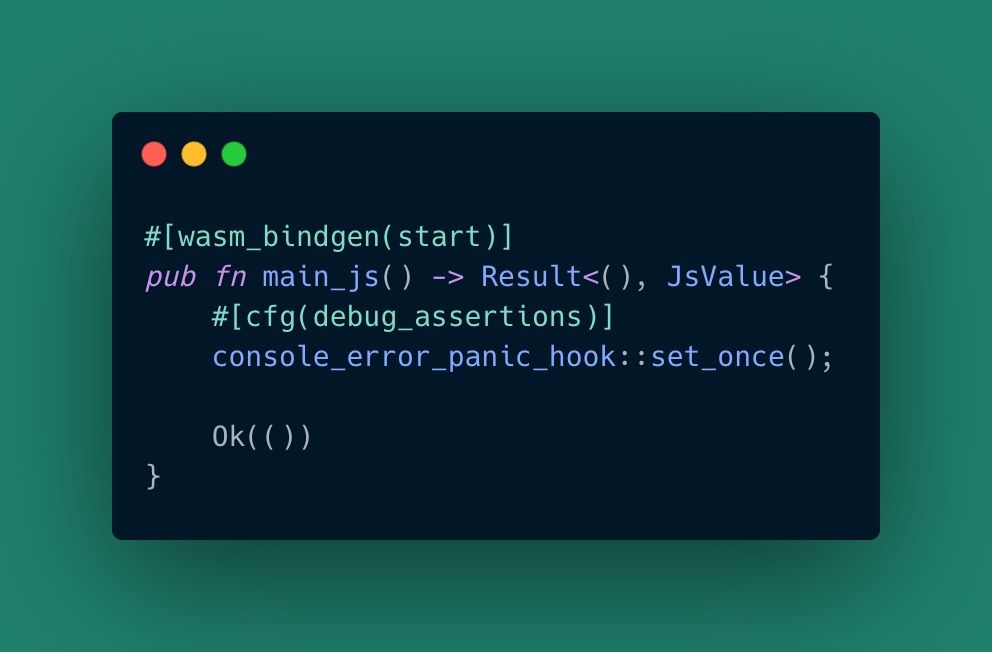
In the example shown above, you can see how a proper error handling is set up. If any errors originated in the Rust code occur in the future, the respective message will be printed using the console.error method instead of just showing up the “unreachable code.”

Step 5. Calling functions inside Node.js
To call a function, we need to build the Rust code using the following command:
wasm-pack build --target nodejs
By doing so, we generate the pkg folder with .js and .wasm files.
Next, we will execute the greet function from the Rust code. This can be done by creating a greet.js file in the js folder.
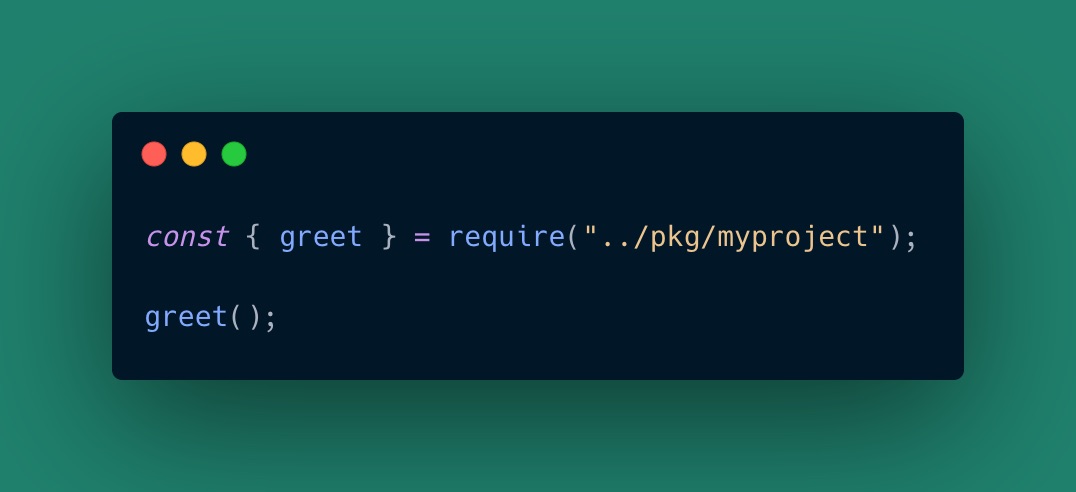
As a result, you will see the “Hello from Rust” message while executing this file.
In Closing
Here we go. It was a quick review of how to use Rust with Node.js. Compared to using NAPI, it’s not that difficult. Next time, let’s dig into more details and take a closer look at how to use the NestJS app to integrate Rust and WebAssembly.
By the way, if you are looking for an expert team that will help you bring toys next web project to live-feel free to drop us a line. We are always ready to help.